With this technique you will be able to resize images on the fly, in this case with a serverless function. This is a really nice example of what you can do with serverless and very useful if you have a website that has a lot of images.
Sometimes you redesign the website or you use the same images in a lot of places, within the post or article, in the blog list and in the home page, and all use different sizes.
The idea is to store images in the server at full size, then you call an endpoint with parameters and you get the image with a different dimension or, even, with a different format (png/jpeg/jpg).
For example like this
https://{server_url}/{image_id}/300x200/jpgThis will return a jpg image of 300 width and 200 height
You have several options to do this, this article will show you how to implement this with AWS lambda. You can build this solution using a proposal from AWS and using a serverless.com proposal (I have used this)
AWS approach
It’s a Cloudflare template from AWS. It’s uses internally S3, Cloudfront, a Node.js code (which uses Sharp library)
https://docs.aws.amazon.com/solutions/latest/serverless-image-handler/welcome.html
Internally it’s build with AWS CDK
https://aws.amazon.com/en/cdk/
You can grab that code.. and modify if necessary.
Serverless.com aproach
This alternative is using the Serverless Framework (serverless.com). For those who don’t know Serverless Framework. It’s a very simple way to describe the resources you need in your cloud server (I use AWS but works with others) and deploy the code easily from the command line.
This nice article https://www.serverless.com/blog/dynamic-image-resizing-nodejs describes how to implement the Image Resize on the cloud. This uses AWS S3 and runs with Node.JS code.
From here you can grab the code base.
https://github.com/serverless/examples/tree/master/aws-node-dynamic-image-resizer
You need to be careful when configuring the Amazon S3 bucket. The docs don’t explain with detail these steps I will cover next.
How to configure the bucket:
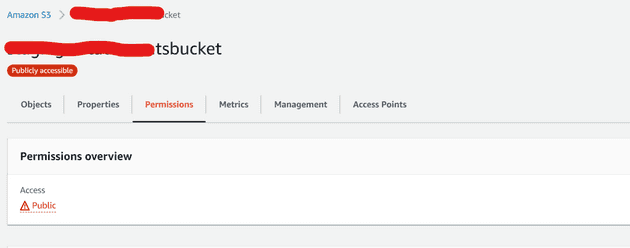
1- The bucket has to be public accessible (set as a hosting)
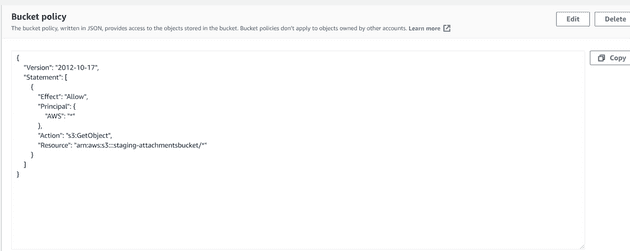
2- You have to set the bucket policy properly
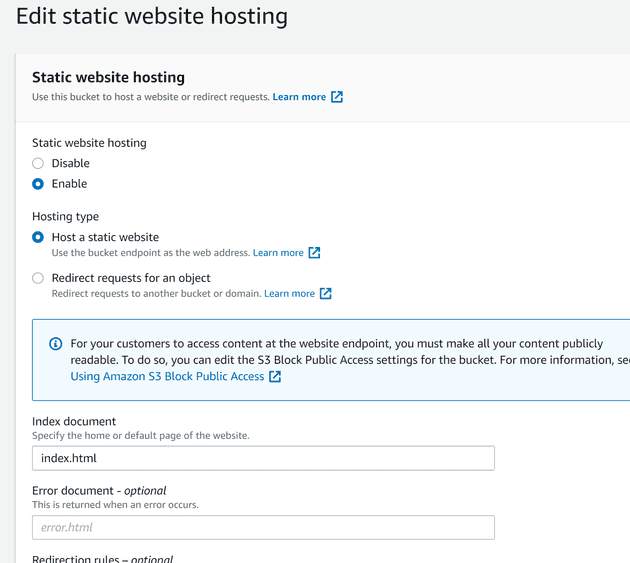
3- Set the Amazon S3 bucket as static
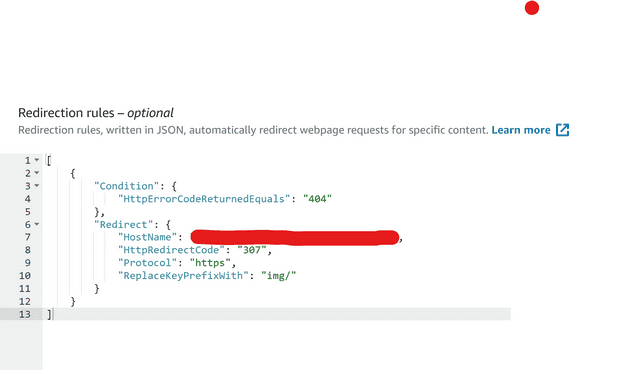
4- Set the redirect rule
5- Use the correct url
Let’s see the steps one by one
1- Make sure the bucket is public.
2- Copy the policy this policy into the bucket
{
    "Version": "2012-10-17",
    "Statement": [
        {
            "Effect": "Allow",
            "Principal": {
                "AWS": "*"
            },
            "Action": "s3:GetObject",
            "Resource": "arn:aws:s3:::{bucket-name}/*"
        }
    ]
}
3- Set the Amazon S3 bucket as static
4- Set the redirect Rule
[
    {
        "Condition": {
            "HttpErrorCodeReturnedEquals": "404"
        },
        "Redirect": {
            "HostName": "your-api-url-without-https",
            "HttpRedirectCode": "307",
            "Protocol": "https",
            "ReplaceKeyPrefixWith": "img/"
        }
    }
]
5- You have to use the “website” url… not the link to the bucket
Don’t use:
https://{bucket-name}.s3.{region}.amazonaws.com/{filepath}Use:
http://{bucket-name}.s3-website.{region}.amazonaws.com/{filepath}Like
http://{bucket-name}.s3-website.{region}.amazonaws.com/300x200/{filepath}This will get the image with {filepath} redimensioned to 300px width and 200px height


