References
https://docs.aws.amazon.com/Route53/latest/DeveloperGuide/RoutingToS3Bucket.html
https://gist.github.com/bradwestfall/b5b0e450015dbc9b4e56e5f398df48ff
Steps
1- Buy the domain
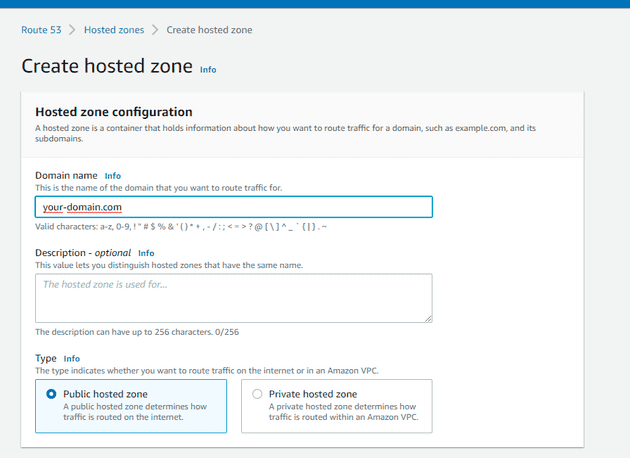
2- Create a hosted zone in Route53
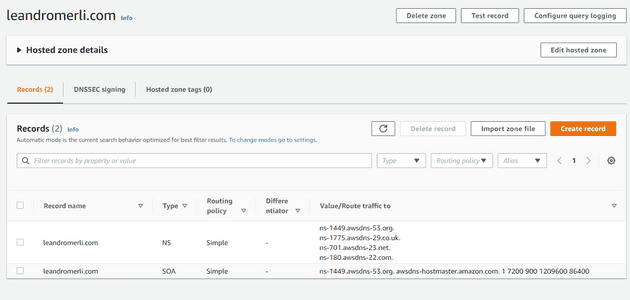
3- Grab the dns names from the hosted zone
4- Go where you register the domain and add/change the dns records
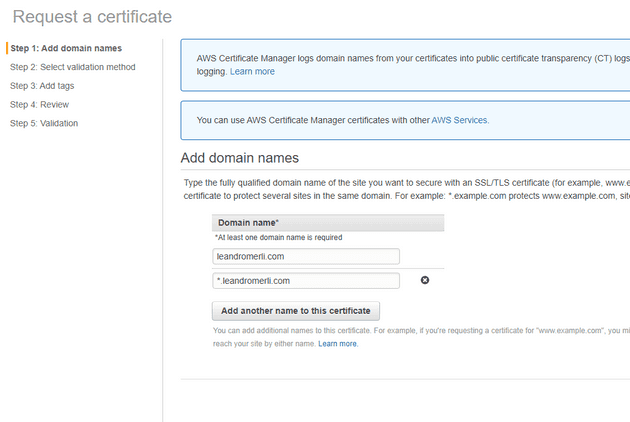
5- Request a SSL certificate (if you don’t have one)
This step is only needed if you plan to have a SSL site (https). You need to use Cloudfront (it might increase the cost of usage).
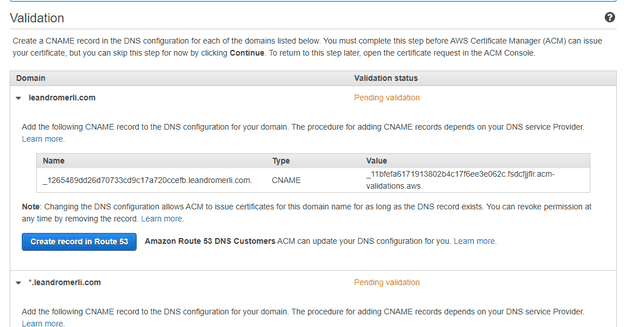
https://console.aws.amazon.com/acm/home?region=us-east-1#/wizard/6- Validate via DNS
Press “Create record in Route 53”
Then click continue.
It might take a while before the SSL is issued
You might need to refresh the page after and see this

5- Create a S3 bucket with the same name as the domain.
your-blog.com
Or www.your-blog.com
6- Make it public
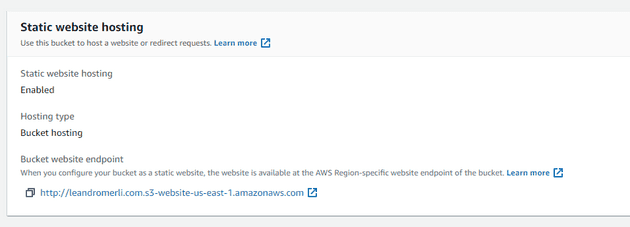
7- Enable static hosting
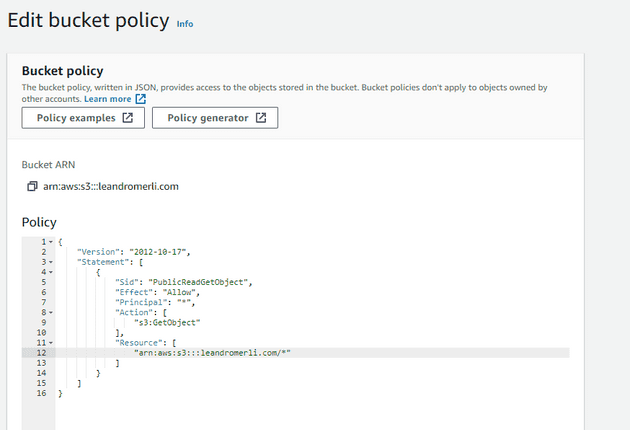
Edit and add a bucket policy
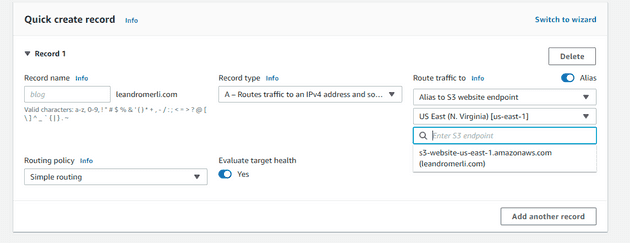
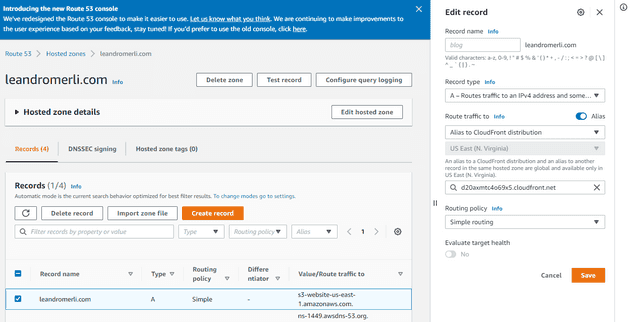
8- Go back to Route53 to your hosted zone and create an A record
9- First test
Create a index.html file like this
<!DOCTYPE html>
<html lang="en">
	<head>
		<meta charSet="utf-8" />
	</head>
	<body>
		<h1>Hello World!</h1>
	</body>
</html>
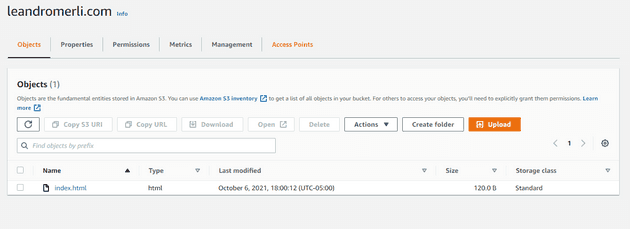
10- Go to your bucket and upload it
11- Check in the bucket static website properties the url or your static website
12- Test now your real domain
13- Now let’s add a cloudfront distribution to enable SSL
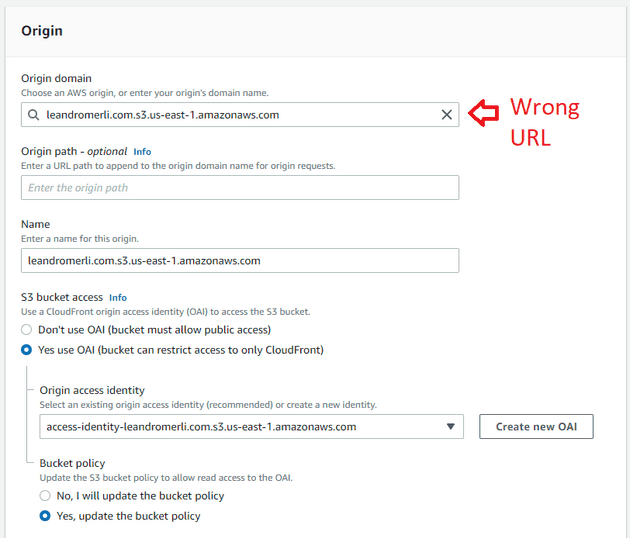
Go to Cloudfront and create a new distribution
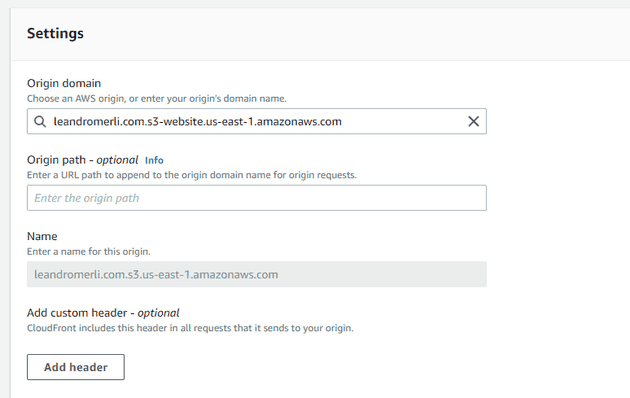
Be careful: That URL I set it’s wrong (it’s a common mistake), the origin domain must be s3-website instead
Now click on Create new OAI
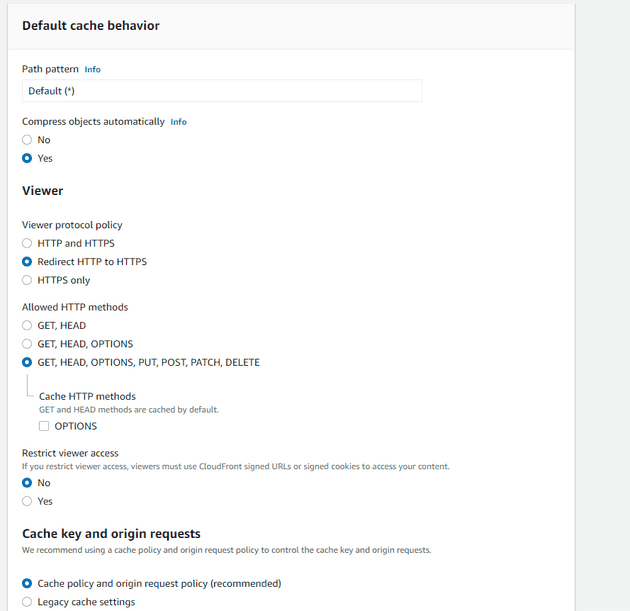
Next check the Cache y other settings
Set Redirect http to https
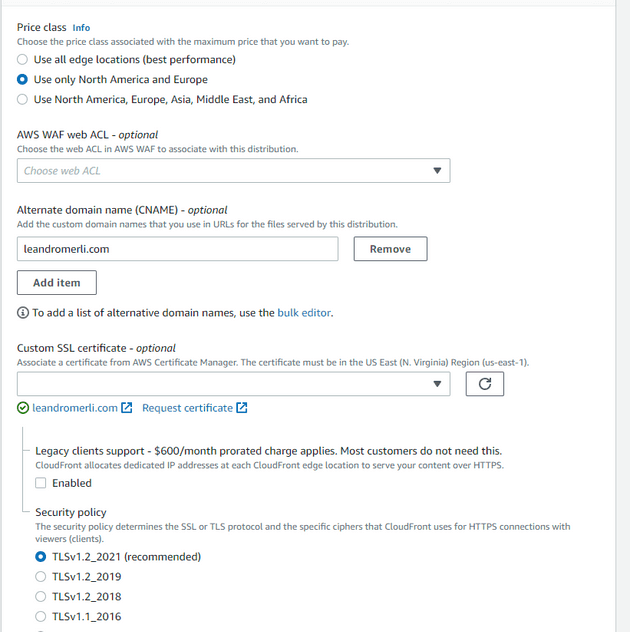
Add the custom ssl certificate you created before
14- Go to Route 53 and edit the domain A record to redirect to cloudfront
